Okay so you have Xcode, the iOS sdk, installed from the first tutorial. Now what do you do with it? Let’s get started with an extremely simple project.
Open Xcode. If you installed it to the default directory it is located at /Developer/Applications/Xcode

Â
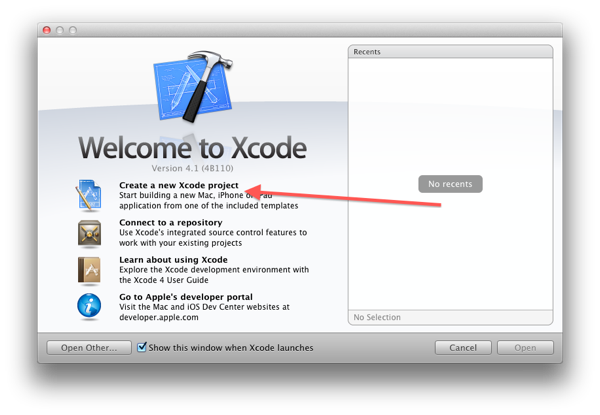
Click ‘Create a new Xcode project’
Â
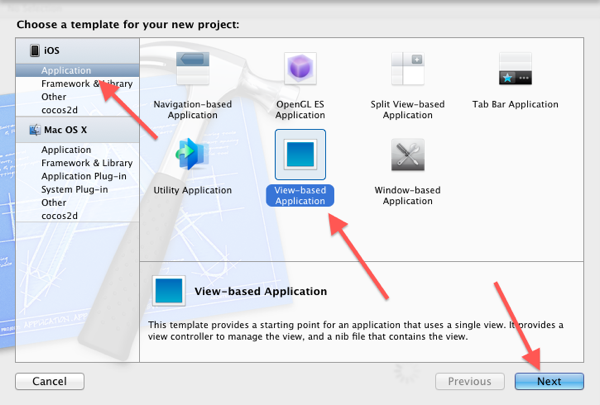
Make sure ‘Application’ is selected under ‘iOS’ and then select ‘View-based Application’ then ‘Next’
Â
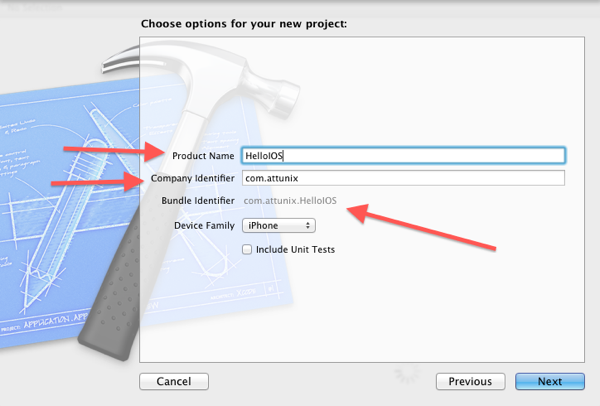
In the next screen we set up the BundleID for the app. BundleID is a unique string that describes the app so generally it is a reverse-DNS style string, like com.companyname.appname. The Product Name is the appname in my example and the Company Identifier is the com.companyname part.
Â
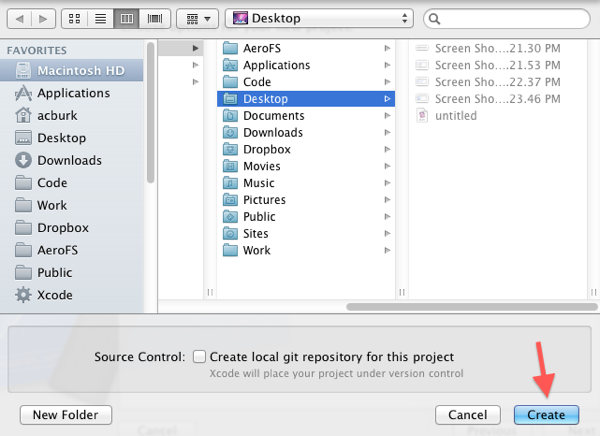
Navigate to the directory where you want to create the project and hit create
Â
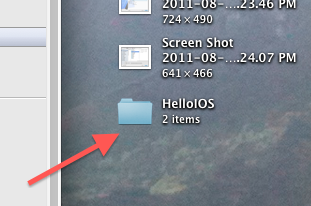
6. That will create the project and open it.
Â
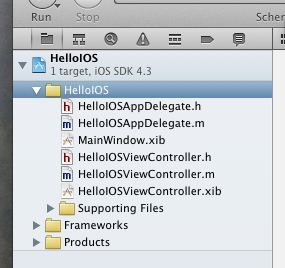
Look at the left hand side.
Â
We have a couple of files that were created for us.
- HelloIOSAppDelegate – These are the class files for application level events.
- MainWindow.xib – This is the xib or ‘View’ for the main window of the application.
- HelloIOSViewController – These are the class files and the view for the main view controller that gets load for the application.
Let’s dive a little deeper and explore what some of these files mean:
- .h file – Referred to as the header file, function signatures are defined here, as well as instance variables.
- .m file – Referred to as an implementation file, this where functions and methods are implemented.
- .xib file – Also sometimes referred to as a nib, these define the views or user interface.
- View – UIViews can be thought of as the basic canvas that you place controls onto.
- Window – UIWindows are a special kind of UIView, typically only one UIWindow exists for a iOS app.
- View Controller – This is a class that manages a view, handling associated view lifecycle events, button event, etc.
Let’s dive right into some fun stuff:
Click on HelloIOSViewController.xib
Make sure you have the Utilities sidebar visible (the one on the right)
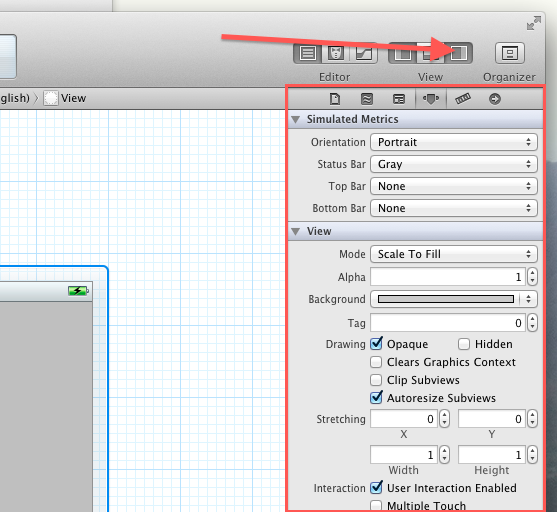
Â
Click on the Object Library Icon (the 3d box) in the lower right
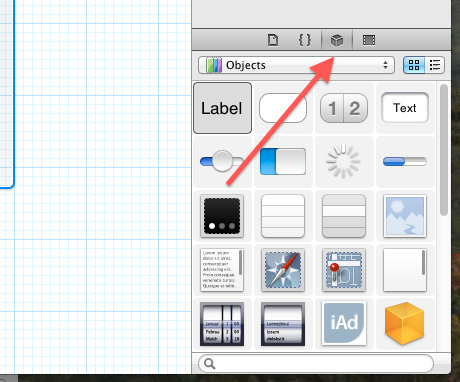
Â
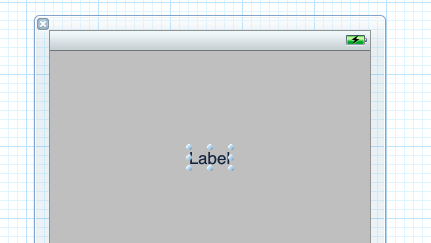
Drag a UILabel onto the view
Â
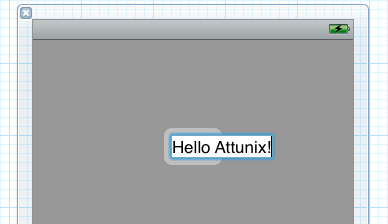
Double click on the label that you just dragged on and type in “Hello Attunix!”
Â
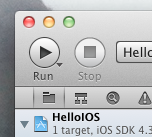
Hit ‘Run’ in the upper left corner
Â
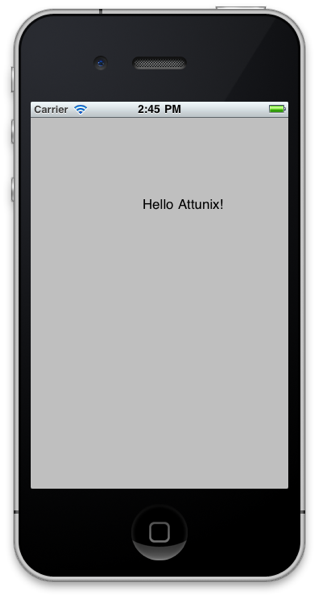
Tada! Your first iOS app!
Okay so now you’re an iOS developer. But let’s face it, this is no Anger Birds. All we really did is change the view. Let’s make some changes that tie into the View Controller.
Drag a button somewhere onto the view and double click it and set the text to ‘Switch’.
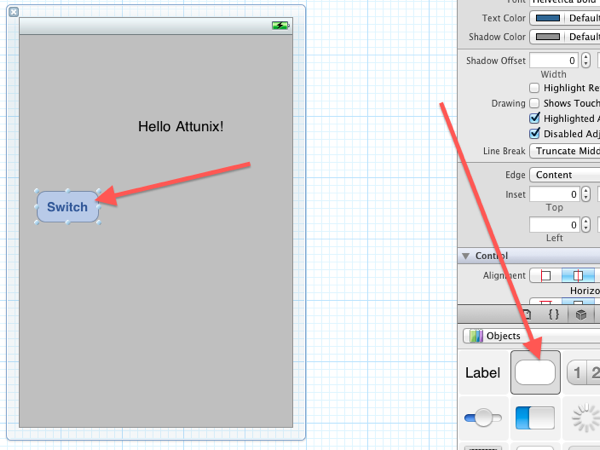
Â
Now, let’s switch to the HelloIOSViewController.h. add the follow code before the @end line.
{
IBOutlet UILabel* greetingLabel;
BOOL hello;
}
Â
– (IBAction)switchGreeting:(id)sender;
So it should look like this:

Â
What did we add with this? Let’s take a closer look.
IBOutlet UILabel* greetingLabel;
An IBOutlet is a hook into Interface Builder (the visual tool we just did all the dragging and adding of controls) elements. This is a hook into a UILabel that we are going to refer to as ‘greetingLabel’.
BOOL hello;
Defines just a regular boolean variable.
– (IBAction)switchGreeting:(id)sender;
This is a definition of a method that is hooked up in Interface Builder. The event and time this when this is executed is determined when we tie these together in Interface Builder, which will do now.
Â
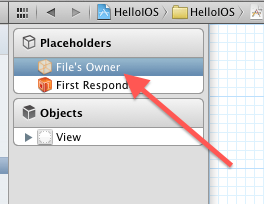
Switch back to HellowIOSViewController.xib. Select the File’s Owner object
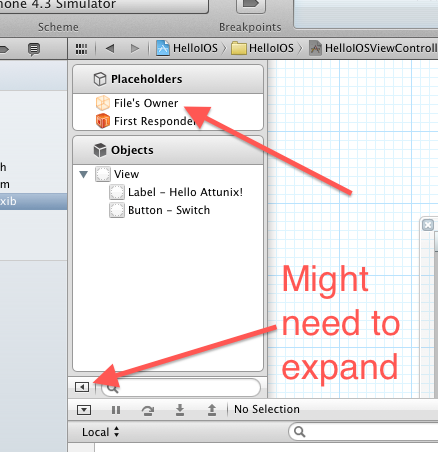
Select the Connections tab (red arrow) on the Utilities sidebar. Now we can see the IBAction and the IBOutlet from the ViewController (green arrows).
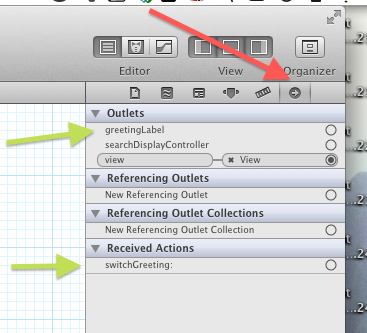
Â
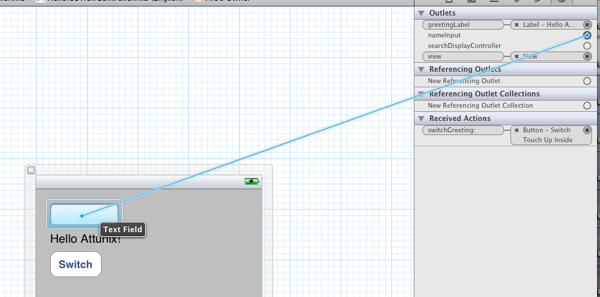
Left click and drag the little circle to the right of the greetingLabel. Drag it to the ‘Hello Attunix’ label. Also click on the ‘Hello Attunix’ label and make it a little wider.
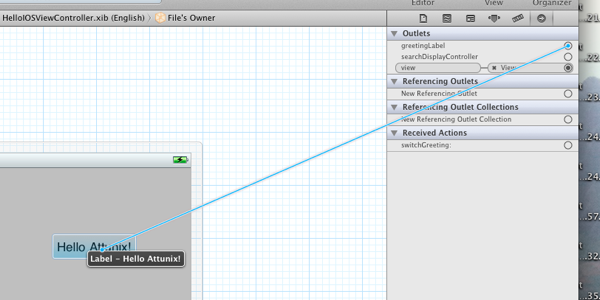
Do the same for the switchGreeting action(to the Switch button) except when you let go, it will ask you what action you want to attach to that IBAction. Select ‘Touch up Inside’.
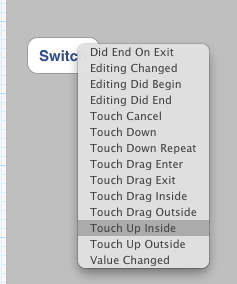
Now hopefully you can begin to see how this is starting to tie together. Controls are dragged and placed in the xib. IBOutlets and IBActions are defined in the header file for the ViewController. Then back inside of xib, it picks up the changes made in the header file and lets the two be hooked up.
Now let’s switch to the implementation file. Add the following code
– (void)viewDidLoad
{
[super viewDidLoad];
Â
hello = YES;
}
Â
– (IBAction)switchGreeting:(id)sender {
if (hello) {
[greetingLabel setText:@”Hello again Attunix!”];
}
else {
[greetingLabel setText:@”Hello Attunix!”];
}
Â
hello = !hello;
}
The viewDidLoad function is a lifecycle delegate method that we are using to simply initialize the hello variable. The switchGreeting function is our custom event code. All it does it set the greetingLabel control’s text based on that hello variable then switch hello to the opposite.
Give it another run!
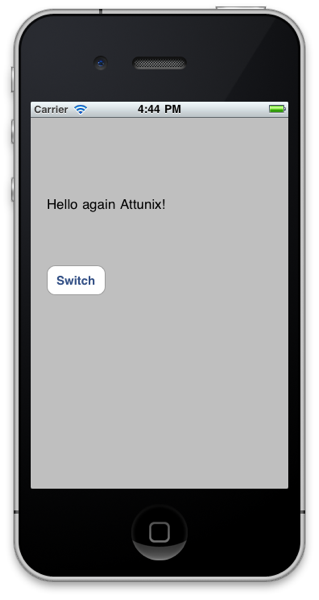
Â
Okay, not bad but it’s missing a certain level of user input. Lets add a text box so we can get the user’s name.
In the HellowIOSViewController.h, create a new IBOutlet for a UITextField.
IBOutlet UITextField* nameInput;
Save the header and switch back to the HellowIOSViewController.xib. We’re going to add a UITextField.
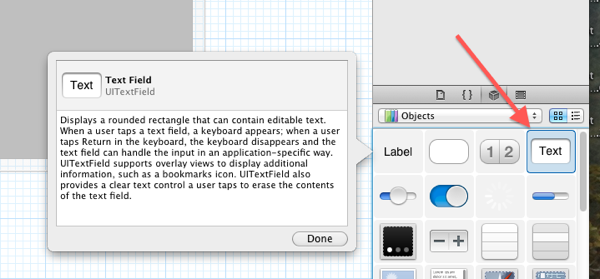
Drag a text field on to the view
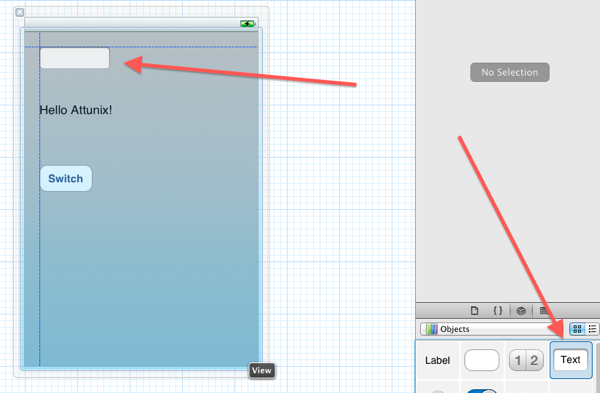
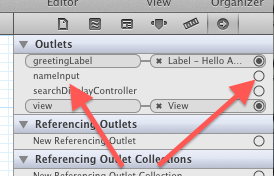
Now using the IBOutlet we added in the header file, we can hook the text field up.
Now, switch to the implementation file (.m) and change the switchGreeting: function to this:
– (IBAction)switchGreeting:(id)sender {
NSString* name = [nameInput text];
NSString* greetingString = nil;
Â
if (hello) {
greetingString = [NSString stringWithFormat:@”Hello again %@!”,name];
}
else {
greetingString = [NSString stringWithFormat:@”Hello %@!”,name];
}
Â
[greetingLabel setText:greetingString];
Â
hello = !hello;
}
Give it a final run. It should now take the text from the text box and use that inplace of Attunix.
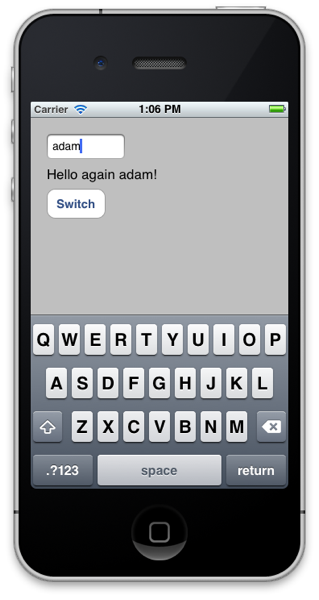
The keyboard won’t dismiss but don’t worry about that for now, another discussion for another day.
Congratulations! How does it feel to be a Objective-C ninja?
Â
Final Source:Â HelloIOS.zip


